
So I finally got myself together enough to tackle stripping down the Acorn A4 laptop. I’d been somewhat nervous about it because of all the admonishments on the forum that it’s a nightmare to get apart, and that it’s fragile. Now the latter part is true – it’s 30 years old this year – and the plastic isn’t…great.
By the way, this isn’t going to be detailed instructions – because they’re here: https://www.chiark.greenend.org.uk/~theom/riscos/a4/dismantle.html. Y’all don’t need me to reiterate them (although perhaps twenty seven eight-by-ten colour glossy pictures with circles and arrows might be necessary ;) ).
That said, step one – remove the econet expansion cover didn’t go very well. Folks on the forum said it’s super stiff y’just have to do it – so I applied more force and the econet expansion cover kinda disintegrated as it came out. Not completely, I can glue it and it’ll look okay externally. I am unsure if it was that way before I started – I mean, I clearly broke one of the tabs – but to be fair it looked like it was corroded in. There’s also some breakage around the vent, but again, I think careful gluing from the back will salvage it.

…because at some point this has had a significant battery acid leak. There was battery acid trapped under the edge of the LCD, there were crystals of NiCd corrosion on the vents…
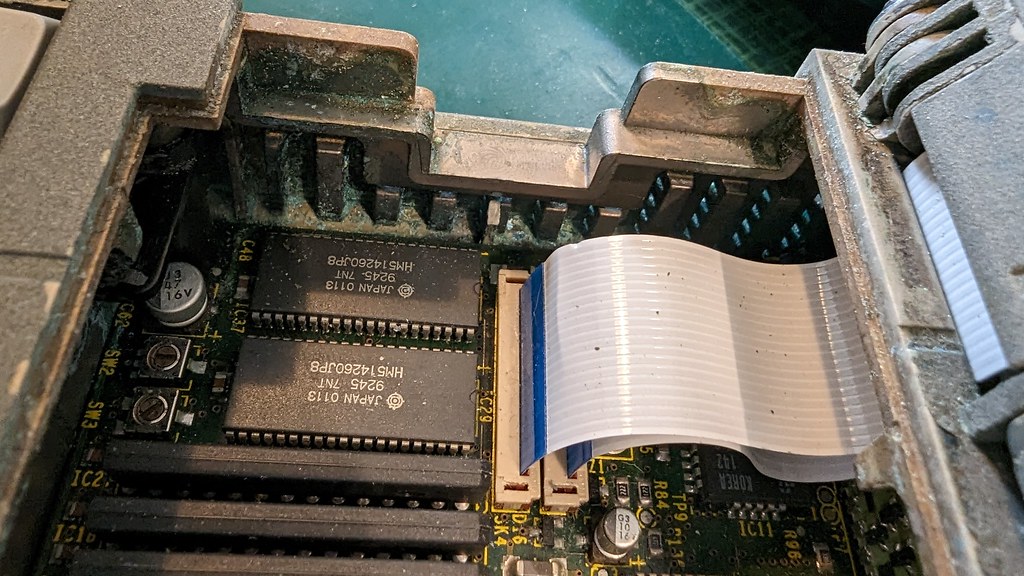
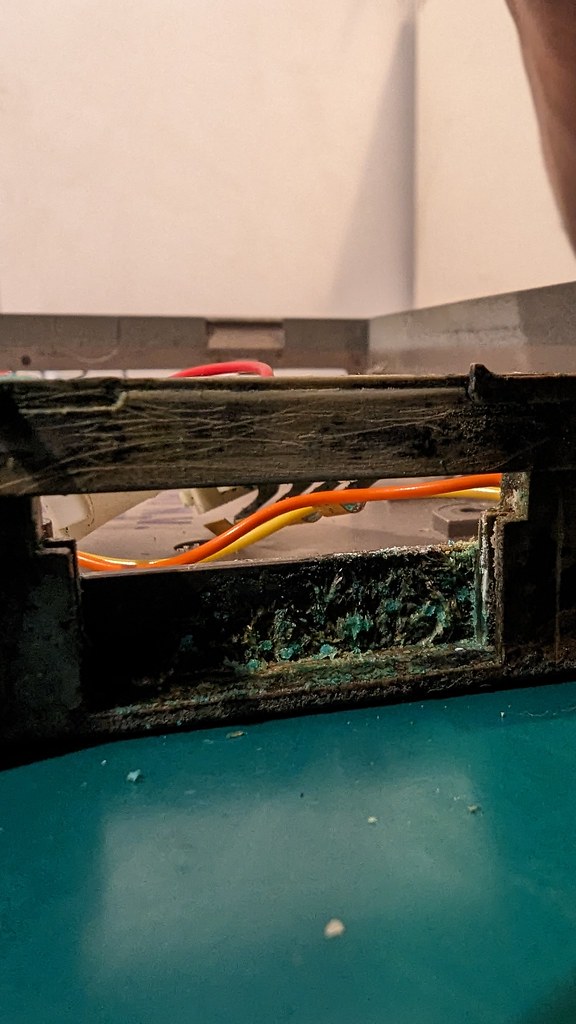
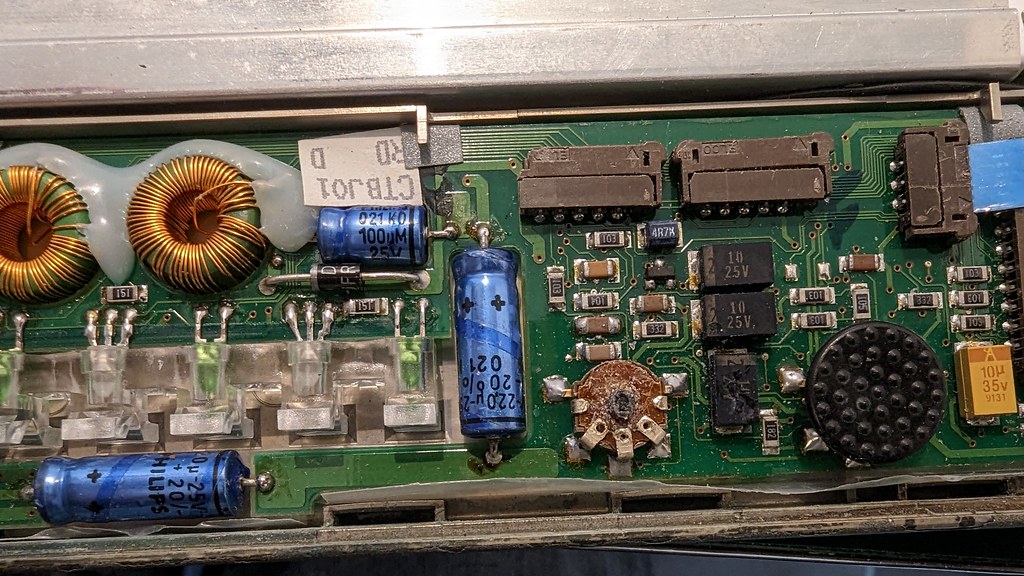
Interestingly, though, despite some very ropey bits of the board – at least two of which are going to require me to reference the circuit diagram and work out what resistors (assuming they were resistors) go in the place where there’s now a just corroded pads with some solder on there and spaces… the acid damage isn’t as bad as I feared. It’s not as good as I could have hoped (had I not seen the crystals through the vent at the left edge of the case). But it does look – salvagable? I hope. But it’s also clearly been apart before. These resistors are apparently not OEM (which explains them, because I thought they were odd):

But also the IDE connector is missing. I’m going to replace the IDE drive with an SD through an IDE adapter. At least, I hope I am. That’s the plan. But it will, iirc, still need the cable – which is kinda annoying. I’m hoping I have the right size of connector sitting around… because otherwise it’ll be something else I need to order.
One thing I don’t need to order – and where I was (fortunately) proven right, is the screen. I ordered that on spec when I paid for the laptop, because I suspected the dead bit of the screen (right where scroll bars will land up) was, in fact, from a screen problem. And I was right, it’s a nasty, unfixable problem:
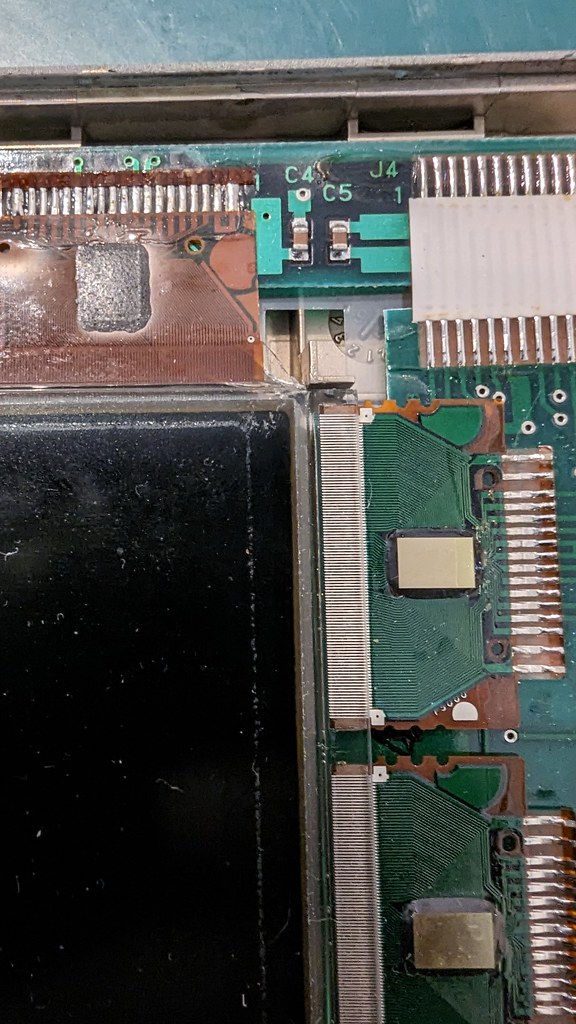
Yeah, that crack in the corner explains the strip of dead pixels. It must have happened on reassembly – yet more evidence this thing has been apart. What’s so weird is that it must have been apart – and then whoever did it put this board in which isn’t in quite as bad-er shape, despite the case being obviously contaminated with NiCd juice. So having got it all apart I spent today basically ignoring the advice not to wash it – and went ahead and washed it. At the moment, there’s a bunch of bits from one of the Acorn NOS suppliers – and it’s sorely tempting to just get that and put it all in a brand new case. But I also like the fact this is clearly a pretty early one (although, tbh, it may just be they bought all the cases right at the beginning).
I also got an ESD safe brush and threw some alcohol at the board…
Before:
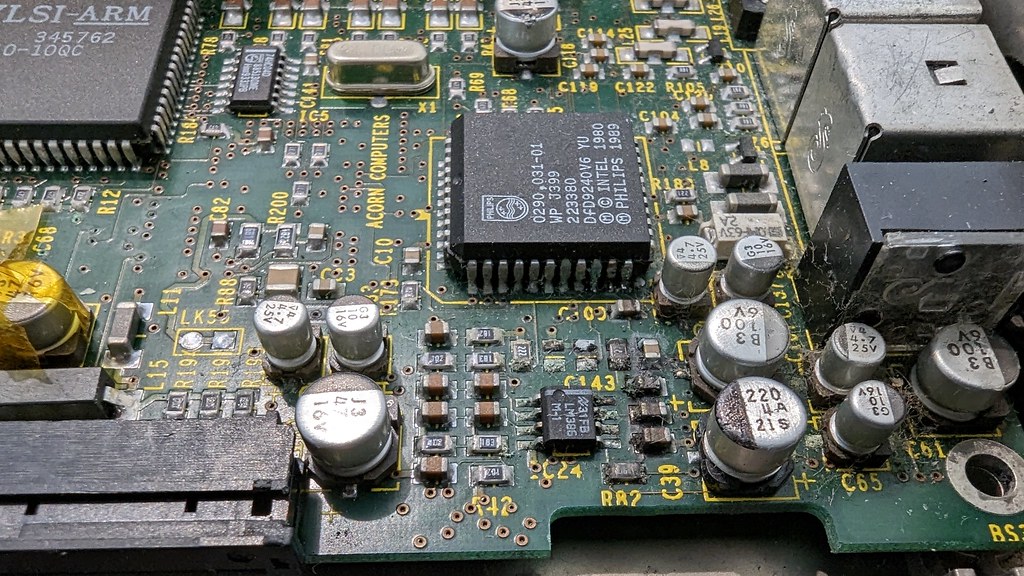
After:

So I need to work out what the missing components are, and I need to also work out what the variable resistor that controls the contrast is meant to be: Then I’ll have to replace those SMD resistors, which will no doubt be super fun on a board that’s corroded like this… and *then* I can use it to write on.
More pics as usual, here: https://www.flickr.com/photos/49965961@N00/albums/72177720306075058