So, progress continues on my Pi Project.
The Pi is now encased in one of the (really very nice) Adafruit Pi Boxes (although mine’s a prototype one that came from e-bay sans adafruit logo). I highly recommend it, it’s a very nice box, with one caveat. If you’re doing hideous things with vintage cables, you may well find it’s more than a smidge tight.
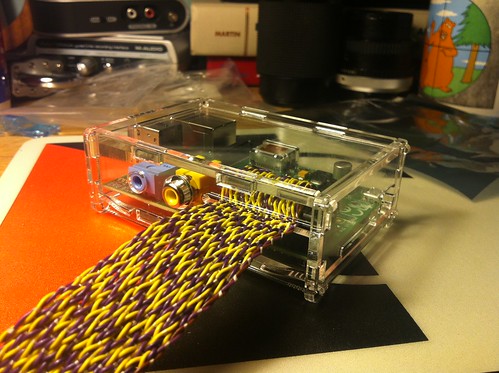
In the end I actually wasn’t happy with my cable and ended up remaking it, spending more time getting the spacing of the cables better, and having finally given in and bought some heat-shrink.
See now, isn’t that pretty.
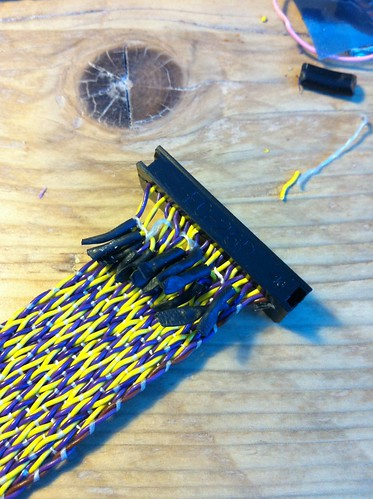
I also wasn’t happy with the other end of the cable:
There was far too much stress on that, and actually I ended up breaking a wire before I’d even connected it. Having pondered issues I stripped that cable off, and got a 15 way D-Sub connector (well, a pair of them)
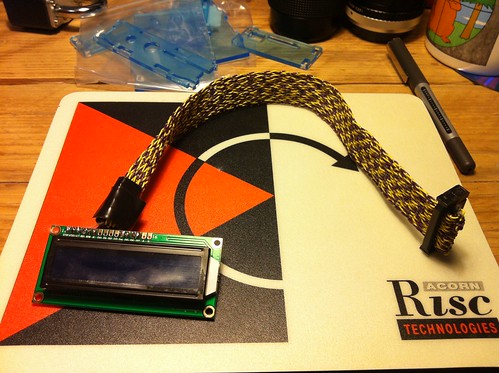
Which also has the advantage that when I want to get a VFD display I can (theoretically) just switch it over. A quick test suggests that it should be working okay, although today I’ve added the backlight LED connection, so we have to pray that all is well when I connect that. It’s all a bit nerve-wracking this, I really would like to not kill it. That ignored, and the slightly grot soldering (it looked beautiful the first time around, but unsoldering it and then resoldering it hasn’t done it any favours, I’m just not that neat) it’s together, and I’m reasonably happy with it.
It still needs a case, although I have ideas for that. But that has to wait until I’ve got it working!
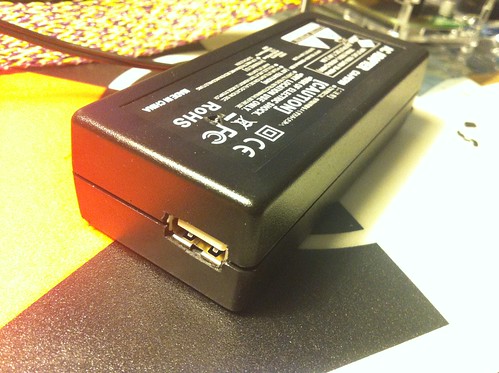
I’ve also modded up one of John’s special power supplies to be a 5V USB supply. I was amazed to find that the plastic of the case was thick enough that with some careful trimming you could actually mount the USB socket in the casing of the thing. It’s insulated too, for the day when the plastic gives up the ghost, but it actually, apart from the slightly uneven trimming, doesn’t look too bad. And when it’s in use, apart from the silver marker crossing out 7.5 volts and writing 5 volts on the back of it, well, it looks positively quite neat.
So this is all progress.
Installing the OS has been a bit tricksy.
Having put Raspbian on the flash drive (correctly, the first time I screwed it up) last night I tried firing it up and rasbi-config did it’s stuff, and I said ‘expand to fill entire SD card’ and… Splutch:
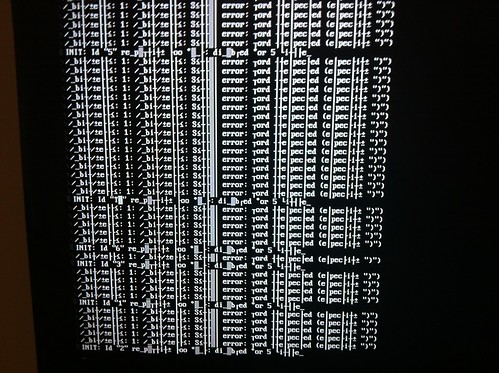
So reinstalled Raspbian and this morning tried again. And, err, no. Splutch, again. I left it for an hour in the hopes that it would recover, but something very bad had happened to the filing system. So I remade the SD card (oh, painful). And off we went again, and this time I skipped expanding it to fill the SD card. Which was fine until I started installing OpenELEC. When I promptly ran out of space.
So, taking my luck in my hands, I restarted raspi-config (the other option being to manually resize the partition, which I considered, but thought I’d try this one last time). And this time it resized the partition, rebooted, and all was well. So I don’t quite know what was going on there.
It is, now, installing OpenELEC from source. Because there’s some suggestion that you need to do that to support the HD44780. Only when I went to make the edits they suggest to the config files, they are, well, unnecessary. Because HD44780 support is already in there. So I’m forced to wonder if that’s still a requirement. If not, then that will be displeasing, because it’s not exactly quick compiling stuff on the Pi. It’s only an ARM11 running at 700MHz. So, yes, it outpaces most of the computers I’ve owned in my life, but compiling is not the quickest of tasks anyhow, and if I didn’t neeeeeed to do it, I could have spent the day doing something else. Anyhow, we’ll see. Basically, I’m wanting to play with it. And I can’t, because it’s using all it’s processor cycles on compiling.
A progress indicator would be nice… :)
The thing is… I’d like to get it working before my days off, because I’d like to spend my days off (a) with my beloved, and (b) decorating the house.
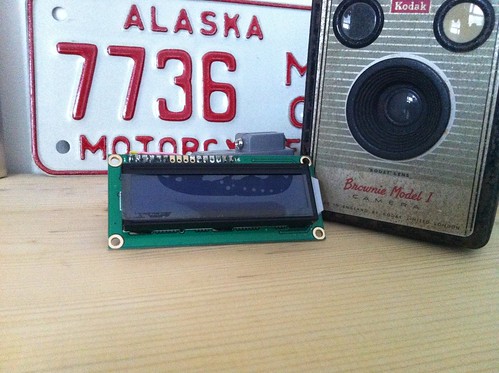
HD47780 references:
In getting the HD47780 wired, I used these pages:
HD47780 RepairFAQ
Wikipedia HD47780 controller page
Hobbytronics Raspberry Pi GPIO Pinout
And last, but most certainly not least:
XBMC OpenElec and HD44780 via Raspberry Pi GPIO
The last page has most of the important stuff on, but my HD47780 was very cheap and the pin-outs had different labels to the ones indicated on that Raspberry Pi forum page; they appear to be a combination of the other labelling schemes.
Comments
2 responses to “Making Pi”
Urg. I’m having problems with my filesystem too. Which version of Rasperian did you use?
I used Raspbmc (the current version). It was fine until I dared turn on overclocking (at all) – although I don’t know if that’s related to the failure.