Because I’m either insane or a masochist, having got Scrivener working yesterday I decided I was going to import my document from word and then attempt to produce an epub. Since that’s essentially what Scrivener is for me, a glorified epub/book pdf producer, since they don’t support Linux properly, and also don’t support Android – and I do all my writing on those two OS’s.
OTOH, there’s a dearth of ‘cuddly’ Linux tools to produce decent epubs and PDFs for printing, so… here we are.
If you’re actually writing in Scrivener, this next bit you might want to skip.
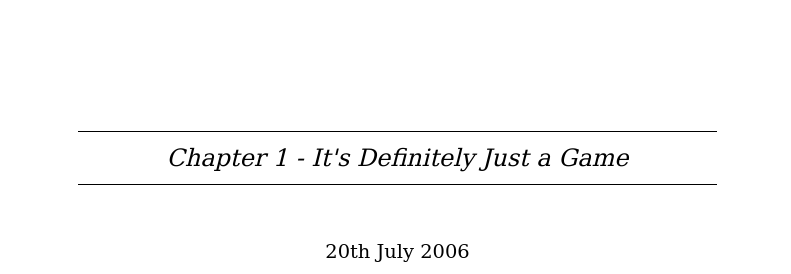
Now, before we get into this properly, I also should say my “import docx” process also was a pain in the arse. Despite the document having separate sections defined for each chapter, and each chapter having a heading, e.g. Chapter 1 – It’s Definitely Just a Game, it singularly failed to correctly divvy that up into chapters. What I ended up doing was running through that document and throwing a # in front of every chapter title and using the “import and split” function, but rather than use the default “Split using document’s outline structure”:

I selected “Split into sections by finding separators in the text”. The only problem with this is that for some reason it also picked up, seemingly only at the end of each chapter, the page number and included that in the text. So every chapter ended “Page nn”. I just fixed that by hand.
Anyway, if you’ve actually written your document in Scrivener, that’s all kinda moot.
Oookay.
The recommended way to set up your books (although Scrivener are very much “you can do it how you like”) seems to be to have a folder for each chapter and then each scene in a separate Text. In my case because I imported a giant 120k word document, each chapter is one scene because I can’t be arsed to separate them.
So you end up with something that looks a bit like this:
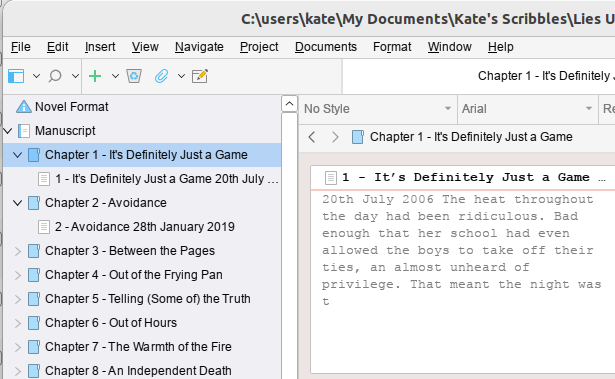
Now again, mine’s kinda funky because of the way I imported it. And my problem was that in my Text for each chapter, I had the chapter number and the title for the chapter and the subheadingy bit where I have the date (fractured timeline story, it hops about a lot). And what I wanted to do was have the chapter number and title as part of the Chapter Title, and then have the subheading-date as the Section Title.
The solution to this would seem to be obvious. Change the Folder Name to the Chapter Title (in my case I just cut/pasted the Chapter Number and Title, but actually I’d probably suggest not doing it that way, and just putting the Title; y’know, in case you want to reorganise things in the future. I mean, my book is done apart from proofreading, so…hopefully it should now be fairly static).
But then the epub that came out was…wrong. And finding the answer to “I would like my Folder names to be used as Chapter Names” turned out to involve a lot of wading through self righteous people explaining how you should read the manual and it’s all clear after that (it isn’t). And a lot of unanswered questions on multiple forums.
So.
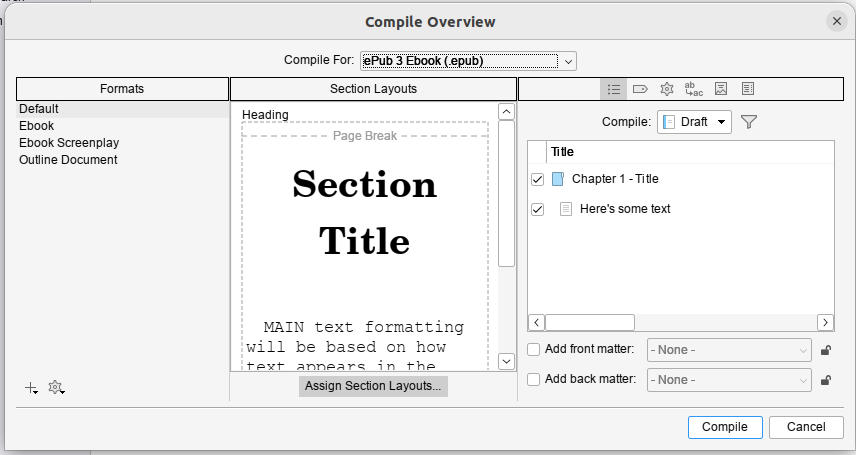
The thing you need is indeed in the Compile Dialog. When you first open it it’ll probably look kinda like this – well, if you select “Compile for epub…” in the drop down menu at the top of the window:
Now I’m going to recommend you go with this plan, so you don’t fuck up the original version, although it’s a bit more involved.
But before we do that, when you click on ebook, if you get this error:
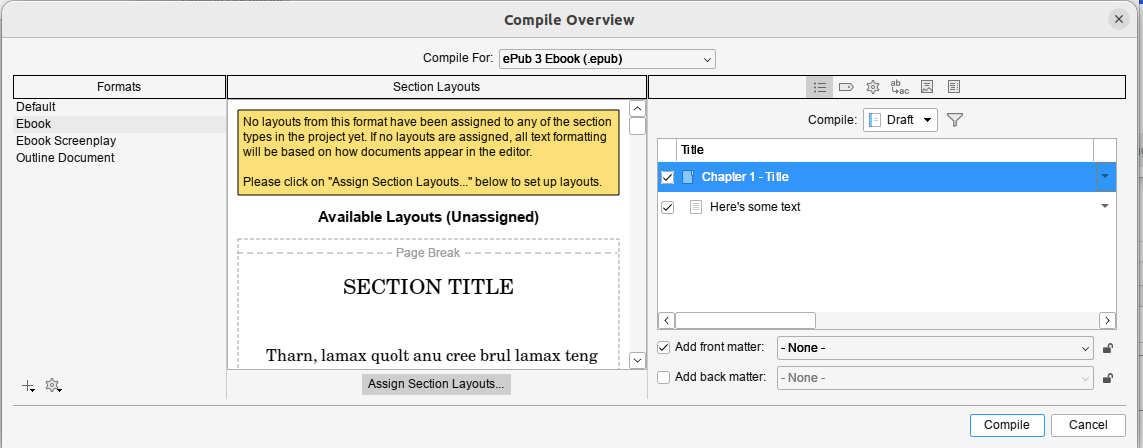
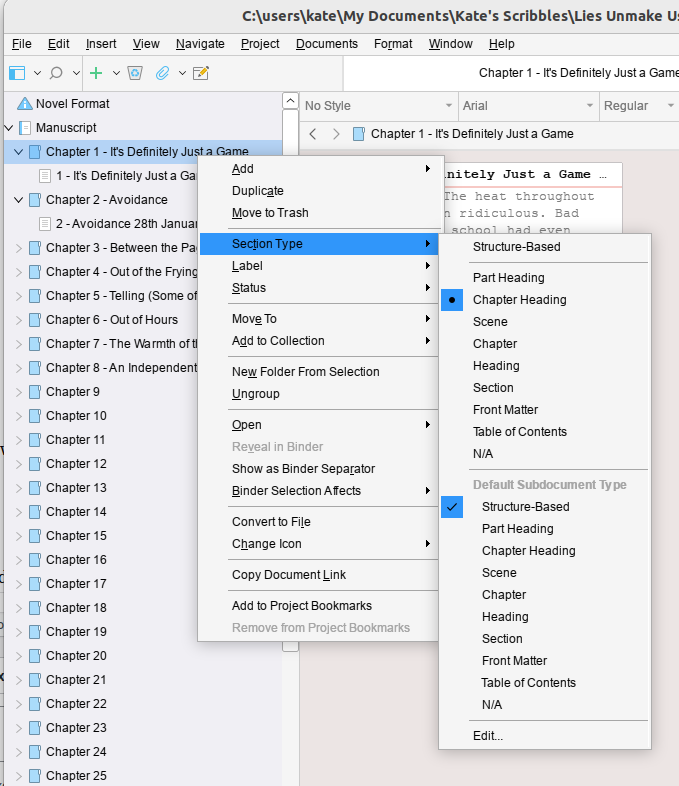
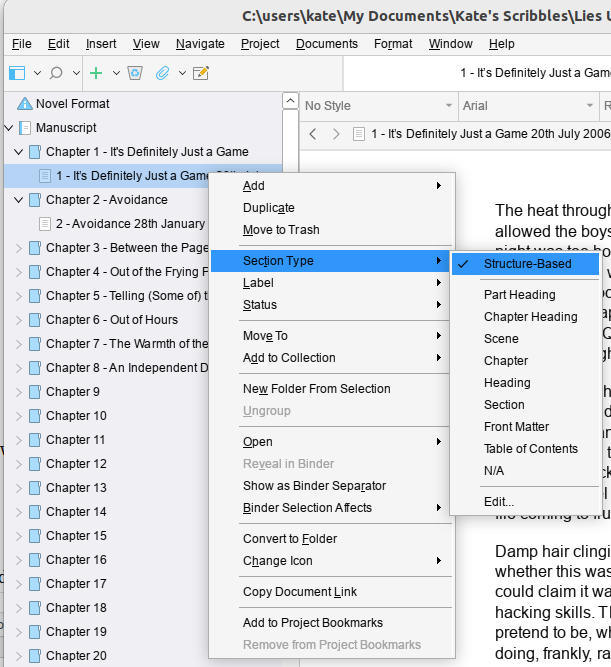
Then you’ll need to cancel out of this dialog and go fix the assigned structure of your book. By default Scrivener sets this to “Structure Based” which I don’t yet know how it’s meant to work, but I can tell you it didn’t work for me.
I had to go set all the folders to Chapter Heading but got away with leaving the individual Texts as Structure Based. If you collapse the tree so all you can see is the folders you can multiselect (Click on the first one and Shift-Click on the last one) and then right click and set them all in one go).
By the way, a reminder, this is really me flying blind and throwing things at the wall until they stick. This worked for me, eventually.
Okay, so back you go to that Compile window and select ebook. Then in one of the Section layouts (the middle section of the window), click on the little grey edity pen icon that appears when you hover around the corners of the example layouts.
Then, for the sake of your sanity, click “Duplicate Format & Edit Layout”; I called mine “Ebook Titles from Folders” because I’m deeply imaginative.
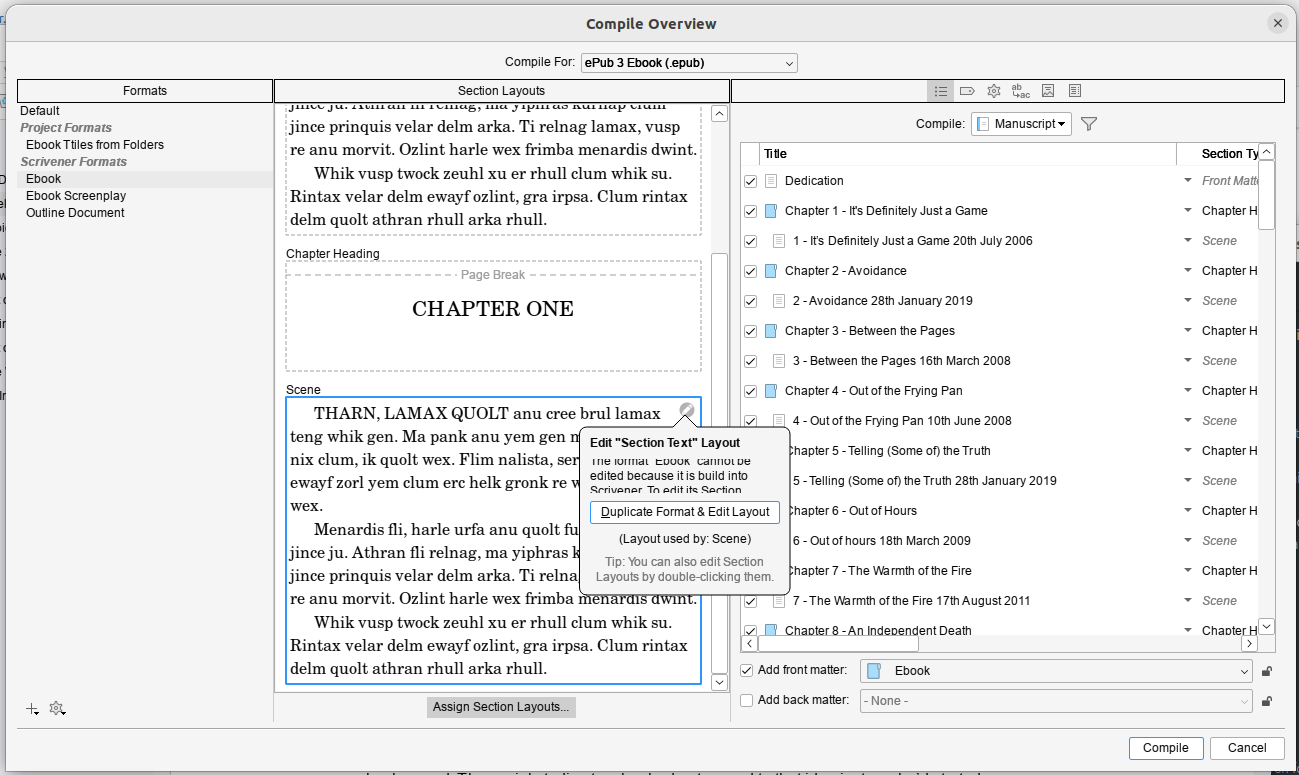 Once that’s done you need the little grey button at the center bottom of the Compile window: Assign Section Layouts…
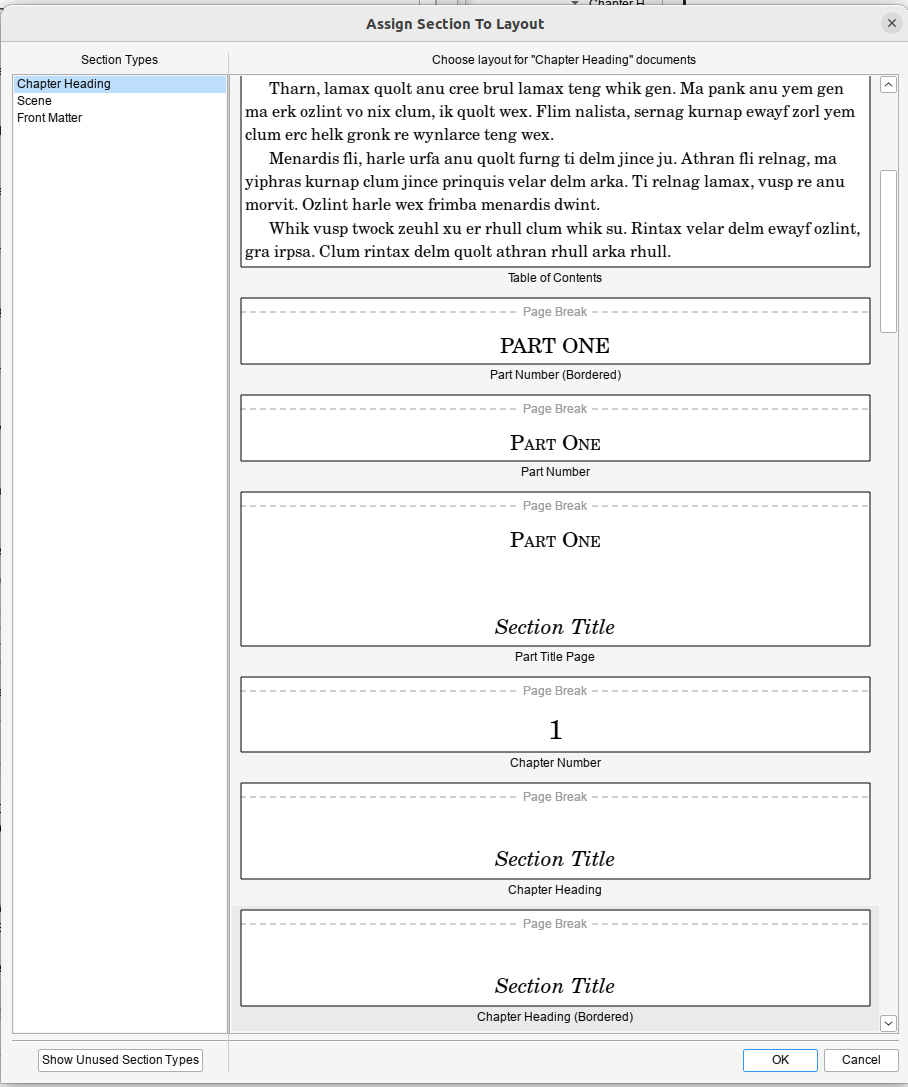 And then you need to assign a layout to each of the Section Types in the left hand pane. This is where it gets tricky, because I didn’t really understand what the examples were showing and it doesn’t provide a live example to show you based on how you’ve set things up. But my current understanding is that if you want your Folder Titles to be your chapter headings, you need to use Section Title. You can choose if you want a page break, or a border, or what have you. If you were wise enough not to hand-edit-in your chapter numbers, you might want a version that automatically inserts chapter numbers *and* a Section title, if that’s a thing you want.
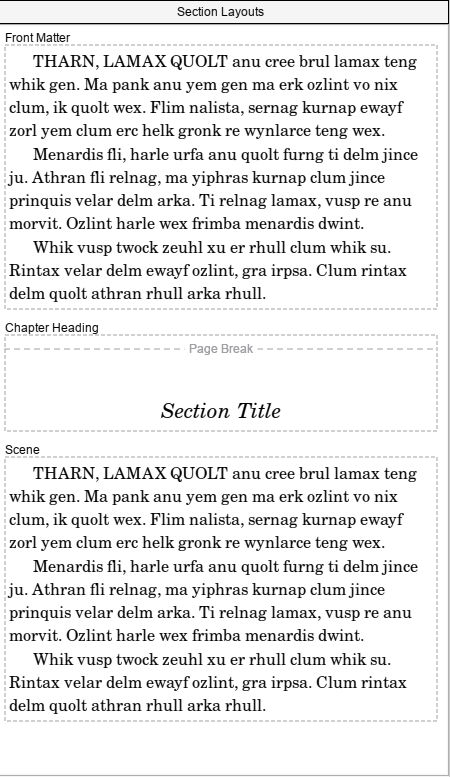
I ended up selecting Section Text for both Front Matter and Scene, and a Bordered Chapter Heading with Section Title for the contents for Chapter Heading:
Obviously, if you want Back Matter, then you’ll also need to set that up. Since this was a ‘quick test’ I was doing to check that epub worked I’d thrown together a quick cover and used that.
Anyhow, once you’ve done that, you can hit compile and you should end up with your folder titles as the chapter title…
 And thank fuck that’s done.